Under-Sink Organization Ideas That Actually Work
You are busy. You want calm at home. A small plan can clear the chaos under your sink and bring ease to daily life.
Start with simple zones. Measure the cabinet so pipes and the disposal fit. Use vertical storage and pull-out drawers to make the back reachable.
Choose wipeable bins and a waterproof liner to protect the base. Leave organizers removable so you can access plumbing when needed.
Build gentle routines. A quick daily reset keeps daily items front and center. A short weekly sweep and a five-minute monthly check preserve the system.
This solution focuses on small wins. It meets practical needs without pressure. It creates space that feels calm and useful.
Key Takeaways
- Measure first. Fit storage around pipes and the sink.
- Create zones with pull-out drawers and tiered shelves.
- Use a waterproof liner and wipeable containers.
- Daily resets and weekly sweeps keep things tidy.
- Choose removable organizers for easy plumbing access.
Start Fresh: Clear, Sort, and Reset the Under-Sink Cabinet
Remove all items first. Seeing everything makes choices simple.
Quick declutter steps
- Take everything out. Lay items on a towel so you can see them at a glance. This saves time.
- Toss empties and expired products. Recycle what you can. Let go of items you haven’t used in six months.
- Sort into four clear piles: cleaning supplies, dishwashing essentials, tools, and backups.

Simple reset
Set aside worn sponges. Keep bottles that spray or pour easily. Remove broken tools.
Wipe the cabinet surfaces and vacuum dust from the area. Clean old spills. Add a washable waterproof liner with non-slip grip.
- Group small things in one shallow container.
- Label bins if that helps the family.
- Return only what you use now. Adjust later.
Daily habit: quick five-minute reset. Weekly: wipe liner and check for leaks. Take a breath. A calm cabinet invites lasting systems.
| Step | Action | Why it helps |
|---|---|---|
| Empty | Remove all items from the cabinet | Shows duplicates and expired products |
| Sort | Make four piles | Speeds finding cleaning supplies and tools |
| Clean | Vacuum and wipe surfaces | Protects from spills and mildew |
| Protect | Add liner and shallow container | Keeps bottles from tipping and the area dry |
Plan the Space: Measure Around Pipes, Plumbing, and Doors
Measure carefully so you know what truly fits before you buy anything.
Start with three clear measurements. Measure the width, depth, and height inside the cabinet. Write each number down. This protects you from returns and wasted time.
Open the door fully. Note the door clearance and any center divider. These details shape what will slide in and out near the sink.
Map obstructions
Look closely at pipes, valves, and the garbage disposal. A pipe bulge or an exposed trap can change shelf placement. Sketch the cabinet and mark obstacles. This shows what the space needs.
Tape out zones
Use painter’s tape on the base to outline bins and shelves. Tape the footprint of a bin before you buy. It is a calm tip that saves money.
Pro tip: choose removable pieces so you can access plumbing quickly if a leak appears. Plan a front “daily use” zone for items you reach for each day.

| Task | Action | Why it helps |
|---|---|---|
| Measure | Width, depth, height inside cabinet | Ensures correct fit for shelves and bins |
| Check clearance | Open door; note hinge and divider | Prevents blocked drawers and rubbing |
| Map plumbing | Mark pipes, disposal, and bulges | Avoids clashes with shelf supports |
| Tape zones | Outline footprints with painter’s tape | Visual test before purchase |
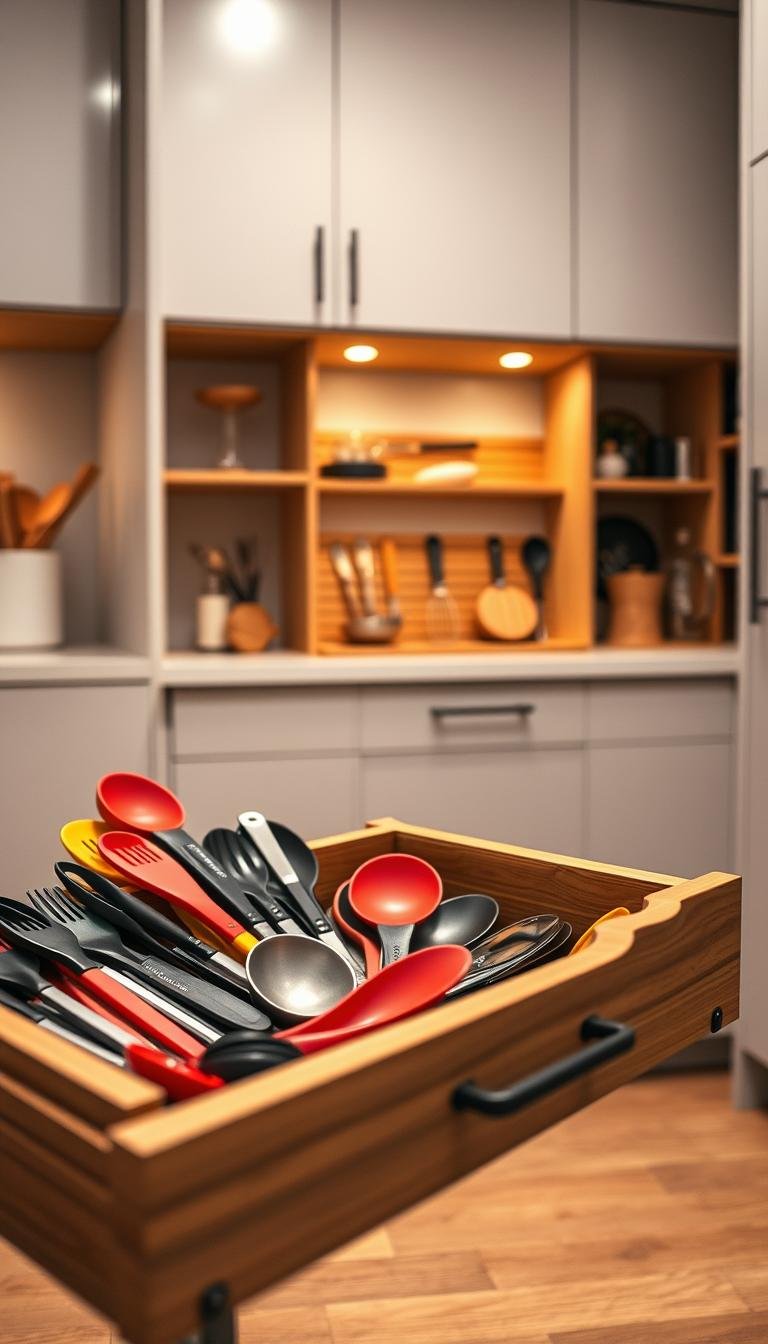
Choose Storage That Fits: Drawers, Shelves, and Door Solutions
Choose pieces that slide and stack so you can reach the back without crawling in.
Pull-out drawers make daily life easier. One gentle pull brings everything forward. You can see bottles and tools at a glance. Pick a drawer with solid rails and wipeable surfaces.
Slide-out bins work where height is tight. They glide and stop things from toppling. Short tiered shelves lift sprays and small containers so labels face you.

Quick picks and how to use them
- Pull-out drawers — best for full-depth cabinets. Easy back access and neat rows.
- Slide-out bins — choose these when clearance is low. Gentle glide. Protects the base.
- Tiered shelves — creates vertical levels for sprays and short bottles.
- Tension rods — hang lightweight sprays by the nozzle. Keeps floor space free.
- Back-of-door caddies — adhesive options avoid drilling and hold cloths and gloves.
- Shallow containers — ideal for small tools and stacks under low plumbing.
| Option | Best for | Key feature |
|---|---|---|
| Pull-out drawer | Deep cabinets | Full back access with one pull |
| Slide-out bin | Low clearance | Glides out; protects cabinet base |
| Tiered shelf | Short bottles and sprays | Creates visible levels |
| Door caddy / tension rod | Small items; cloths; sprays | Slim storage; no drilling needed |
Material tip: choose coated, wipeable materials that resist moisture. Keep organizers unfixed so plumbing stays reachable. Test any piece with the door closed before you buy.
Build Simple Zones You Can Maintain
Design a daily-use area that keeps your most-used items within reach. A clear front zone makes mornings easier. It reduces decision fatigue. It gives you calm.

Front “daily-use” bin for sprays, sponges, and dishwasher sheets
Create a front bin near the door. Keep sprays, sponges, and dishwasher sheets where you can grab them in one move.
“One handled caddy saved me ten trips between rooms.”
Use a small handled container to carry supplies. Group refills behind the front bin so they stay visible. Limit backups to what you actually use.
- Place the most-used items within one hand reach.
- Keep a handled container for quick carry to other rooms.
- Store cleaning supplies in one section and dish tools in another.
- Put refills to the back in a single layer.
| Zone | What | Why |
|---|---|---|
| Front | Daily bin with sprays and sponges | Fast access for routine tasks |
| Middle | Handled container for carry | Easy to lift and clean other rooms |
| Back | Refills and backups | Prevents overflow and hidden clutter |
Quick note: Put liquids on a low tray to catch drips. Stand sponges upright to dry. Keep it simple. Tune the plan to what your kitchen needs.
Room-by-Room Under-Sink Organization Ideas
Treat each cabinet like a tiny station that serves one clear purpose. Keep setups gentle and doable. Small steps add calm.

Kitchen
Set one bin with dish soap, dishwasher sheets, and a bottle brush. Add a small divider for lids and straws. Keep reusable bags standing in back so they do not slide.
Quick checklist:
- One handled bin with soap, sheets, brush
- Divider for small pieces
- Slim container on the side for gloves and cloths
Pantry utility sink
Dedicate a section for refills and extra paper bags. Group light-duty tools so you can grab and go. Add a short shelf above low pipes if plumbing allows.
Quick checklist:
- Refills and paper bags in one spot
- Small products on the short shelf
- Tall bottles under the shelf
Bathroom
Choose gentle supplies only. Use a small caddy for items like cotton swabs and floss picks. Keep extra toilet paper in a covered bin for a calm look.
Quick checklist:
- Caddy for cotton swabs and small items like floss picks
- Covered bin for extra toilet paper
- Low tray if the cabinet is shallow
Laundry / utility sink
Group stain spray, scrub brushes, and microfiber cloths together. Label the bin to make pretreat steps faster. Use a low tray for shallow cabinets so the floor stays dry.
Quick checklist:
- Stain spray + scrub brushes in one bin
- Microfiber cloths folded and labeled
- Kid-safe locks and store harsh products elsewhere
| Room | Core items | Tip |
|---|---|---|
| Kitchen | Dish soap, sheets, brush, bags | Slim container on the side to keep space sink area clear |
| Pantry | Refills, paper bags, light tools | Short shelf above pipes for small products |
| Bathroom | Gentle cleaners, TP, cotton swabs | Use a caddy and covered bin for calm |
| Laundry | Stain spray, brushes, cloths | Label bins and refresh after two weeks |
Final note: Refresh each room’s setup after two weeks. Tune what lives in front and what sits back. Small consistency creates big ease. One minute to reset keeps each sink space calm.
Step-by-Step Systems and Routines
A short, steady routine protects calm and saves you time. Small, repeatable steps keep the space usable. They stop clutter from creeping back in.

Daily quick reset
Daily (one minute): return each item to its zone. Stand sponges to dry. Set bottles upright so caps do not drip.
Weekly sweep
Weekly (three minutes): wipe the liner and fronts of drawers. Do a quick cleaning of door pulls and handles.
Tip: run your hand along the base to feel for moisture. This simple check protects the cabinet and keeps access easy.
Monthly tune-up
Monthly (five minutes): pull one drawer at a time. Toss empties. Combine partial supplies carefully and label what you keep.
Refresh shelves and labels if routines changed. Rotate supplies to the front when you restock. First in, first out reduces waste.
Gentle habit: note one small win each week. A family label or icon helps everyone know where things go. Keep organizers removable for fast plumbing access.
| Routine | Action | Time |
|---|---|---|
| Daily | Return items, stand sponges, upright bottles | 1 minute |
| Weekly | Wipe liner, tidy drawers, check for leaks | 3 minutes |
| Monthly | Declutter empties, refresh labels, adjust zones | 5 minutes |
Make the Most of Awkward Space: Around Pipes and Doors
Little gaps around pipes and doors hide simple storage opportunities. You can use slim pieces to add function without blocking access. These fixes keep things calm and easy to reach.

Expandable shelves and narrow caddies
Use an expandable shelf to bridge over pipes. Adjust it around valves so the surface stays level. This gives you a steady spot for small bins.
Fit narrow caddies along the side for brushes and gloves. Slim shapes slide into tight gaps. They hold long tools upright and stop items from sliding behind the pipes.
Door storage that keeps access
Add low, flat door storage with removable adhesive. Check clearance so the door closes cleanly. Keep the back clear if shutoff valves sit there. Quick reach matters when you need to turn water off.
| Material | Good for | Why |
|---|---|---|
| Coated metal | Durable shelves | Moisture resistant and easy to wipe |
| Sturdy plastic | Light bins and caddies | Won’t rust and cleans quickly |
| Adhesive caddies | Door-mounted tools | Removable and drill-free |
Quick tips: put lighter items high and heavy bottles low. Test a dry fit. Open and close the door three times before you load. Aim for a simple solution that keeps every shutoff and hose reachable.
Smart Materials and Small Upgrades That Last
Choose finishes that resist dampness and make care easy. A few thoughtful swaps protect the cabinet and reduce daily chores. Small changes can add years of service and calm.

Moisture-safe choices
Pick coated metal or stainless steel. They stay sturdy when splashed and clean with a quick wipe.
Use clear plastic bins and trays. They show bottle levels at a glance. They wash fast. They do not rust.
Consider sealed bamboo for a softer look. Only use bamboo that is finished for moisture.
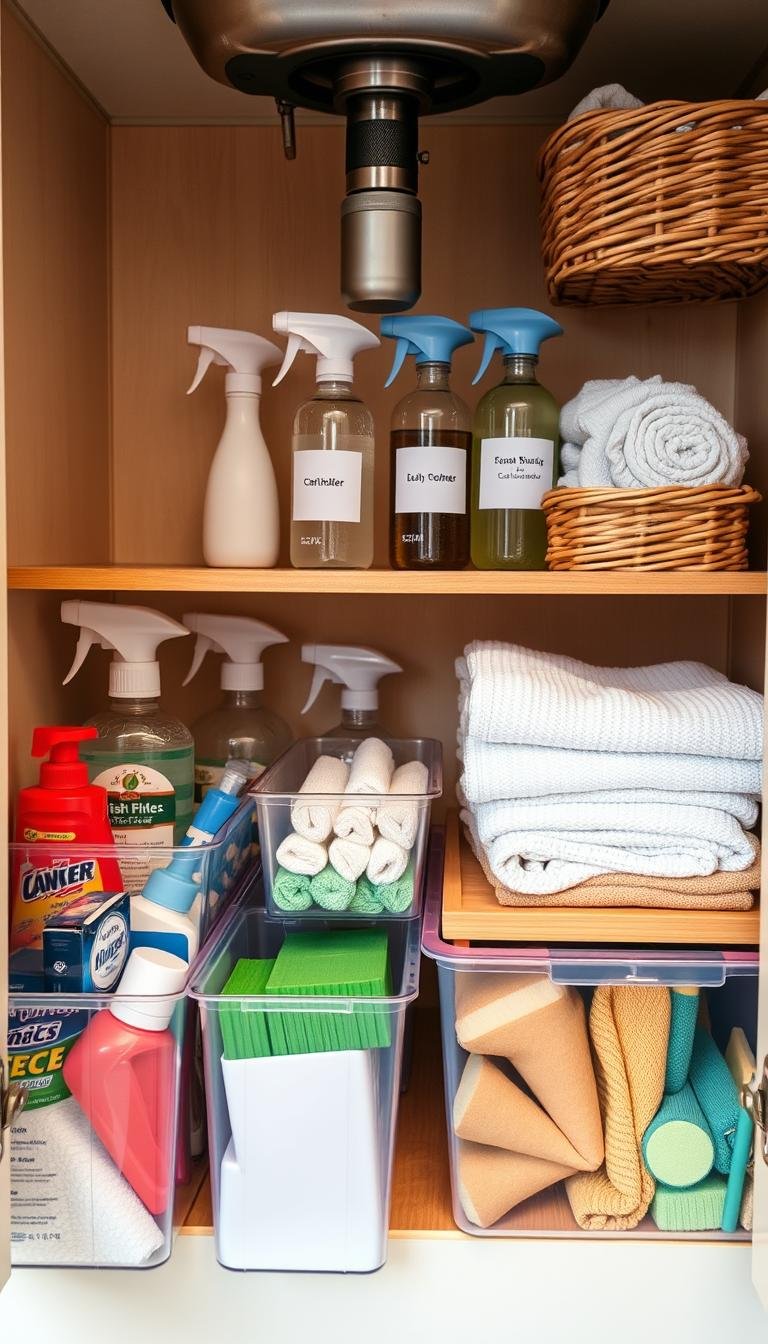
Protect the base
Add a waterproof liner plus a shallow tray at the bottom. It catches drips and keeps the cabinet dry. This small extra saves repair time later.
- Choose smooth interior containers so residue rinses away.
- Keep bottles upright in snug holders to stop tipping.
- Label with water-resistant tags or write on plastic.
- Avoid untreated wood or fabric near the bottom. They absorb spills and warp.
- Pick storage you can lift out in one move for quick access.
“A simple liner and a few wipeable bins made upkeep almost effortless.”
| Upgrade | Why it helps | Best material |
|---|---|---|
| Tray + liner | Captures leaks and makes cleanup fast | Plastic or coated metal |
| Clear bins | Shows product levels and speeds restock | Sturdy plastic |
| Raised shelf | Keeps bottles off the bottom and dry | Coated steel or sealed bamboo |
Conclusion
A single low pull-out can change how you use the whole area. It brings bottles and tools to you. It makes the back reachable. It saves time each day.
Keep it simple. Measure for plumbing and door clearance first. Choose one or two drawer-style pieces. Add a waterproof liner and a short shelf if space allows. Use clear, wipeable containers for small items and sponges.
Routines matter. Do a one-minute daily reset. Wipe the liner weekly. Tidy and toss empties each month. These small habits protect your cabinet and your plumbing.
Quick checklist: measure, pick a pull-out or drawer, add a liner, set a front daily zone for dish soap and dishwasher sheets, and keep backups behind in one calm container.
FAQ
How do I start clearing the space under my sink without feeling overwhelmed?
Begin with a short, gentle session. Pull everything out. Toss empties and expired cleaners. Group like items—cleaning supplies, dishwashing items, tools, backups. Wipe shelves and add a waterproof liner. Keep the pile small. You’ll feel lighter and ready to plan storage.
What measurements matter before buying drawers or bins?
Measure width, depth, and height. Check door clearance and map plumbing—pipes, garbage disposal, and any center divider. Note bulges and obstructions. Use tape on the floor of the cabinet to mark zones. This simple step prevents returns and wasted time.
Which storage options work best around pipes and tight corners?
Choose slim, narrow caddies, expandable shelves, and tension rods. Pull-out drawers and slide-out bins let you reach the back without kneeling. Back-of-door caddies store sprays and sponges without blocking pipes. Aim for flexible pieces you can move as needs change.
How can I build simple zones that stay tidy?
Create three easy zones: front for daily-use items like sprays, sponges, and dishwasher sheets; middle for refills and backups; back for bulky items and seasonal supplies. Use clear bins or labeled containers. A quick daily reset keeps zones working with little effort.
What should be stored under the kitchen sink versus the bathroom or laundry sink?
Kitchen: dish soap, dishwasher sheets, bottle brush, trash bags in a bin. Bathroom: gentle cleaners, extra toilet paper, a small caddy for cotton swabs and travel-size products. Laundry/utility: stain spray, scrub brushes, microfiber cloths, and refills. Keep hazardous chemicals separate and out of reach of children.
What materials resist moisture and last near sinks?
Pick moisture-safe materials: coated metal or stainless steel, durable plastic, and bamboo that’s treated or sealed. Avoid untreated wood. Choose corrosion-resistant hardware and waterproof liners to protect surfaces and extend the life of shelves and drawers.
Any quick routines to maintain the cabinet without spending much time?
Yes. Do a daily quick reset: return items to their zones and let sponges dry. Weekly, wipe the liner, check for leaks, and tidy containers. A five-minute sweep once a week prevents buildup and keeps the area calm.
How do I store cleaning bottles and sprays so they don’t tip or leak?
Use upright caddies with partitions or a deep tray to catch drips. Back-of-door organizers with secure pockets work well for lighter sprays. For heavier bottles, a pull-out bin keeps them steady and makes access easy. Always tighten caps after use.
Can I use drawers or pull-outs with existing plumbing and a garbage disposal?
Yes. Choose shallow, adjustable pull-outs that clear the disposal and pipes. Measure around the disposal and check height. Some slide-out trays fit around plumbing or attach to the cabinet base. These save bending and make the back of the cabinet usable.
How do I keep sponges, cloths, and brushes from staying damp and smelling?
Store sponges and cloths in a breathable caddy or hang them to dry. Let bottle-neck openings face down. Replace sponges often and launder microfiber cloths. A small tray that allows airflow keeps items drier and fresher.
What are simple door-mounted solutions that don’t block access?
Slim, low-profile door caddies and fabric pockets work well. Choose products with shallow depths so doors close easily. Magnetic hooks and small bins for rubber gloves, brushes, and trash bags keep frequently used items in reach without obstructing plumbing.
How should I store trash bags, spare sponges, and small items for easy access?
Use clear, labeled containers or stackable bins near the front. A narrow dispenser for trash bags keeps rolls tidy. Small items like sponges and scrubbing pads fit in a shallow tray or divided box so you can grab what you need fast.
Are there affordable products that make a big difference?
Yes. Look for inexpensive pull-out bins, tension shelves, clear plastic containers, and adhesive hooks. A quality waterproof liner and a couple of labeled bins often transform the space. Small upgrades give big wins in ease and calm.
Any tips for keeping cleaning supplies safe around children and pets?
Store hazardous products in a locked bin or on a high shelf. Use childproof latches on cabinet doors if needed. Keep smaller items like packets and disinfectant wipes out of reach or in sealed containers. Safety first. Peace of mind follows.