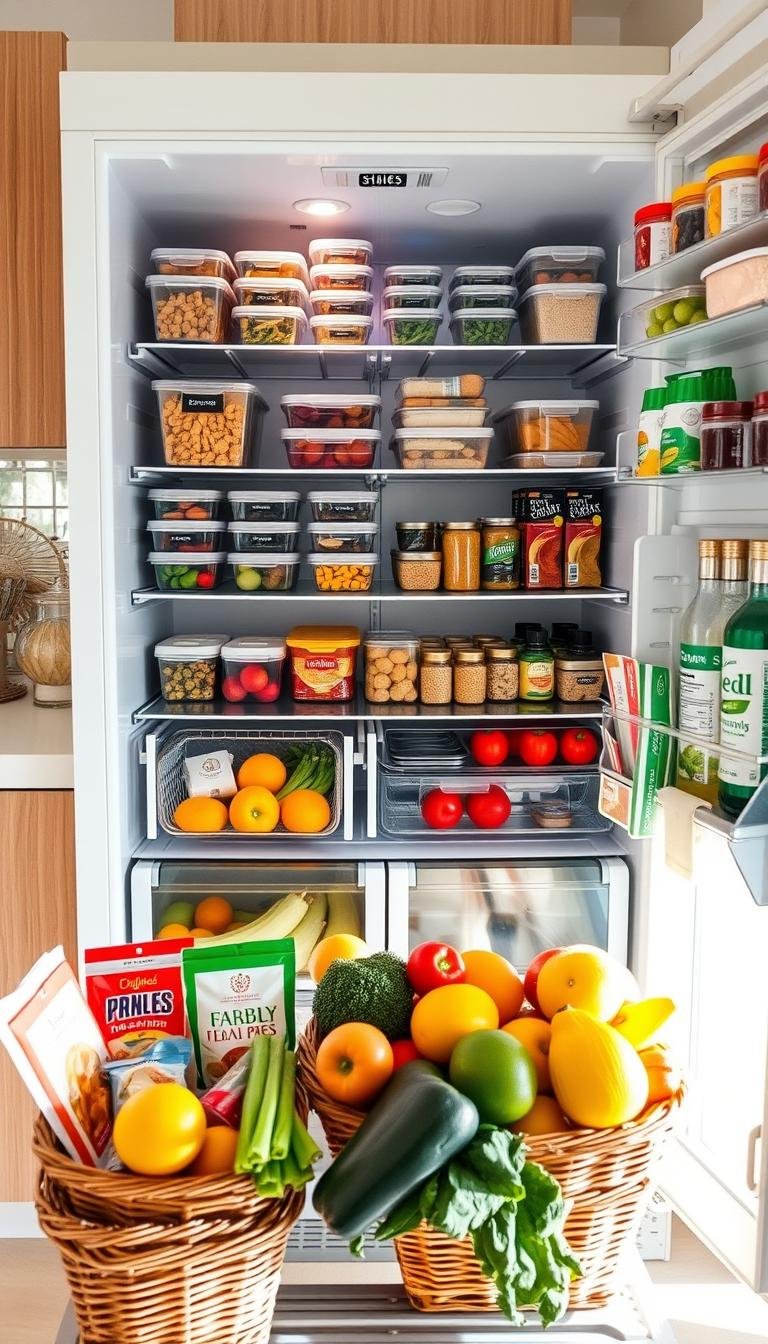
Fridge Organization for Busy Families
You are busy. You want calm in the kitchen and peace at home. Small systems can make a big difference. This gentle plan helps you start today without pressure.
See what you have. Save time and money. A clear refrigerator makes items visible. It cuts duplicates and reduces food waste. Simple bins, clear containers, and an easy organizer help this stick.
We’ll share quick wins. Daily resets that take minutes. A light weekly check. A soft monthly review. Experts like Chantell Dennis and Kate Lubenesky recommend easy tools such as lazy Susans for condiments and simple shelf tweaks.
This approach focuses on small steps. No harsh chemicals. No perfection. Just calm habits that fit your real life.
Key Takeaways
- Small daily resets save time and cut waste.
- Clear bins and containers make items easy to find.
- Simple organizers like lazy Susans keep condiments tidy.
- Weekly checks prevent duplicates and protect food.
- Monthly reviews keep systems fresh and gentle.
- These steps help your kitchen support your home life, not the other way around.
Why a Calm, Organized Refrigerator Makes Life Easier
A calm, tidy refrigerator helps you move through the day with less stress. You see what you have. You grab what you need. Meals happen faster.
Visibility saves time. When items are easy to spot you cook leftovers before they spoil. You avoid buying duplicates. That cuts food waste and saves money.
Place soon-to-eat foods front and center. Put ready-to-eat items up high. Keep raw meats low and contained. These small moves protect food safety and keep things simple.
The door is warmer. Use it for condiments and quick-grab items. Light labeling removes guesswork. Two-minute daily resets keep the rhythm going.

| Benefit | Action | Result |
|---|---|---|
| Save time | Clear zones and front placement | Faster meal decisions |
| Cut waste | See leftovers and use them first | Less food tossed. More money retained |
| Protect safety | Store ready-to-eat up high; meats low | Fewer spills and safer meals |
- Gentle systems reduce decision fatigue.
- Baking soda can help with odors when needed.
- Keeping a simple routine makes your refrigerator part of your home care.
Fridge Organization: A simple plan that saves time and money
A few focused minutes can turn clutter into calm. This short plan gives clear wins. It uses few tools. It fits busy life.

Quick wins you can do today
Start small. See big results. Follow these steps and notice how much time and money you keep.
- Do a 10-minute scan. Move soon-to-expire foods front and center. Create a simple “Eat First” spot.
- Group like with like. One bin for breakfast. One for snacks. One for lunch prep.
- Add two small tools: a turntable for condiments and one clear bin for front items.
- Use storage containers you already own. Add one or two food storage containers for stackability.
- Adjust one set of shelves to fit tall drinks or cartons.
- Try silicone bags for small produce and odd shapes.
- Empty half-full boxes into bags or containers. Clip instructions inside.
- Label quick changes with painter’s tape and a date.
- Set a five-minute timer tonight. Toss trash. Wipe a spot.
- Celebrate the small win. It’s a gentle way to build confidence.
Easy tools that make a big difference
Keep tools minimal. Clear bins and a small turntable change how you store and find items.
These simple organizers save space. They make your kitchen routine easier. Start with one change today.
Declutter and Reset: A gentle, step-by-step clean-out
Start with a gentle clear-out so you can see what truly matters. This reset is kind. It gives you a fresh start. Move slowly. Breathe. No perfection needed.
Empty, sort, and toss without guilt.
- Empty the fridge. All of it. Lay items on a counter so you can see them.
- Quick toss with care. Expired or spoiled things go. No shame. Make room for what serves you.
- Sort into simple categories: breakfast, snacks, leftovers, produce, proteins, condiments, cheese.
- Use a few bins and containers to corral groups. Keep similar sizes for easy stacking.
- Place a rimmed baking sheet as a pull-out tray. It acts like a gentle organizer.
- Adjust shelf heights to fit what you actually buy. Tall cartons and short jars both fit better this way.
Keep raw meat on the bottom. Use a plate or tray under it to catch drips. Avoid storing milk in the warm door. Leave breathing room in drawers so cold air circulates.
“A simple reset shows you what you have. It makes the next meal easier.”

| Step | Tool | Benefit |
|---|---|---|
| Empty fully | Counter space | See all items clearly |
| Corral categories | Clear bins / containers | Easy stacking and reach |
| Use pull-out tray | Rimmed baking sheet | Gentle organizer for small things |
| Adjust shelves | Adjustable heights | Fits tall cartons and varied sizes |
Final step: Wipe shelves with warm soapy water. Skip harsh chemicals. Use a soft cloth. Label with painter’s tape if it helps. Keep the system light and flexible.
Map Your Refrigerator Zones for stress-free storage
Map the main zones so every item has a calm, useful home. A clear plan helps you see food quickly. It also keeps safety simple. Below are easy zone notes you can adapt to your family.

Top and upper shelves: leftovers and ready-to-eat
Upper shelves are slightly warmer. Place cooked meals and ready-to-eat items here. Keep them front and visible so they get eaten first.
Middle shelves: dairy, eggs, prepped items
Use the middle shelf for yogurt, cheese, and prepped bowls. This area has steadier temps. Put daily grabs at eye level to make mornings faster.
Lower shelves and back fridge: cold zone for raw proteins
The lowest shelf toward the back stays coldest. Store raw meat here. Add a small container or tray underneath to catch drips.
Door shelves: condiments and quick-grab items
The door is the warmest spot. Save it for condiments, dressings, and hardy jars. Avoid storing milk there.
- One bin per zone keeps items from drifting.
- Use a turntable for jars that hide in the back.
- Leave space near drawers and vents so air can move.
Safe Meat Storage to prevent leaks and cross-contamination
Safe handling of proteins keeps your kitchen calm and your family healthy. A few small steps stop drips and prevent germs from spreading.

Where to place meat, poultry, and seafood
Keep raw protein low. Store meat on the bottom shelf toward the back of the refrigerator or in a dedicated chill drawer to catch any leaks.
Use a single bin or tray under packages. That protects other food and makes cleanups quick.
How long meats typically last in the fridge
Follow simple timing so you know when to cook or freeze.
- Raw beef, lamb, veal, pork: 3–5 days.
- Ground meats and raw poultry: 1–2 days.
- Cooked meat and poultry: 3–4 days.
- Cured or smoked: 1 week unopened; 3–5 days after opening.
Simple labeling and containment to protect other foods
Keep original packaging for 1–2 days. Then transfer to sealed containers or bags and place them on a tray.
- Add a quick label with the purchase or use-by date.
- Store all raw proteins together so you can track them at a glance.
- Don’t overpack. Airflow helps keep temps steady.
| Type | Raw fridge days | Quick tip |
|---|---|---|
| Steaks / roasts | 3–5 days | Keep in original wrap up to 2 days; then seal |
| Ground meat | 1–2 days | Use or freeze quickly |
| Poultry | 1–2 days | Bottom shelf or chill drawers only |
| Cooked meats | 3–4 days | Label with date; front for easy use |
“If you won’t use it in time, freeze it. Thaw overnight in the refrigerator.”
Containers, Bins, and Turntables that keep items visible
A few smart containers change how you see and use your food every day. Start with what you already own. A small change is enough.
Clear bins and glass containers help you spot leftovers and snacks fast. Choose one or two sizes that stack well on your shelves. Glass lasts longer and looks calm. Upcycle jam jars for a low-cost container option.
Silicone bags are flexible. They hold odd-shaped produce or small leftovers. They wash easily and cut single-use plastic.

Lazy Susans and simple turntables
One lazy Susan for condiments and small jars makes the back reachable. Try a trusted brand like OXO Good Grips for smooth spins. Keep just one turntable per category so you avoid extra clutter.
- Choose clear bins to see items at a glance.
- Add a pair of silicone bags for odd shapes.
- Use one lazy Susan for condiments and small jars.
- Prefer glass where you can. Upcycle jars for budget-friendly storage containers.
- Match sizes to your shelves for neat stacks.
Try one option at a time. Test what works. Keep tools minimal. That gentle approach keeps your system working for real life.
Labels, Dates, and an “Eat First” Bin to cut food waste
Simple labels and a tiny “eat first” bin cut guesswork and save money. Keep the system easy. Small steps make big changes. You will waste less and feel calmer.

Masking tape or a label maker—pick what you like. Masking tape peels clean and costs little. A label maker speeds the job. Both work. Use short words and big writing so you read labels fast on busy days.
Front-and-center placement for soon-to-eat items
Create one small “Eat First” bin at eye level. Put about-to-expire items and leftovers there. Keep the bin intentionally small. That nudges you to use items quickly and cuts waste.
- Add a date when you cook or open something to track freshness.
- Store leftovers in clear containers with simple labels so you actually use them.
- Do a 30-second scan before each meal and pull items into the bin.
- Keep labeling tools in the kitchen. Make the habit easy.
| Task | Tool | Benefit |
|---|---|---|
| Label with date | Masking tape or label maker | Helps you track and use food |
| Create Eat First bin | Small clear bin | Increases visibility; reduces waste |
| Store leftovers | Clear containers | Faster meal choices; less spoilage |
Kid Zones and Snack Systems that support independence
Give each child a small bin on a low shelf. Make snacks reachable. Make choices simple. This builds confidence and keeps your kitchen calm.
Use shallow drawers with dividers for deli items and cheese. That stops piles. It keeps slices neat. Kids can grab what they need without help.
Place fruit cups and yogurts in clear containers so kids see options. A lazy Susan or small turntable corral pouches and small snacks. Put hardy items in the door if they tolerate slight temperature changes.
- Create a low-shelf snack zone with a bin per child.
- Add a labeled drawer divider for deli and cheese.
- Keep consistent sizes so returning items is easy.
- Use an organizer for refill supplies; store extras in the pantry.
- Rotate snacks weekly to keep interest low-clutter.

| Zone | Tool | Best for | Tip |
|---|---|---|---|
| Low shelf | Small bins | Individual snack choices | Label with names or pictures |
| Shallow drawer | Dividers | Deli items, cheese | Keep similar sizes together |
| Door shelf | Clear containers | Hardy snacks, drinks | Only items that handle temp swings |
| Snack station | Lazy Susan / organizer | Pouches, small items | Rotate weekly; refill from pantry |
Talk about safety together. Raw items stay off the kid shelf. Set simple rules. Praise small wins. Independence grows one calm step at a time.
Leftovers and Prepped Food: stack, store, and track
Leftovers can become your lunchtime hero with a few gentle steps. Keep one dedicated shelf for prepped meals and leftovers. This makes choices fast. It helps you avoid wasted food and time.
Portioning and stacking to use what you have
Cool food quickly. Move hot dishes into shallow containers so they chill fast and stack neatly. Portion meals into single-serve containers for easy weekday grabs. Use similar sizes so stacks stay steady and shelves stay tidy.
Simple rotation: oldest in front, new in back
Label each container with a clear date. Place new items behind older ones. This little habit keeps the oldest items visible and used first.
“A small rotation rule saves time and cuts waste.”
- Keep a small turntable for condiments so they don’t steal prep shelf space.
- Adjust one shelf height to fit your most-used storage containers.
- Plan one “leftovers night” each week to clear the shelf and save money.
| Task | Tip | Why it helps |
|---|---|---|
| Cool and portion | Shallow containers | Faster chilling; easy stacking |
| Label with date | Masking tape or label maker | Track freshness; avoid guesswork |
| Rotate | Oldest front, new back | Uses food before expiry |
| Freeze extras | Freeze within 3–4 days for cooked meat | Extends life; prevents waste |
- Add a weekly reminder to check dates and freeze what you won’t eat.
- Keep the system light. If a container type is fussy, try another that fits your shelf.
Daily, Weekly, and Monthly Refrigerator Routines
Small, repeatable routines make daily life in the kitchen feel softer and steadier. These steps are quick. They protect food. They save you time and worry.
Daily two-minute reset
Two minutes is enough. Move your “Eat First” items to the front. Cap and close jars and bottles. Return stray things to their bins and containers.
Wipe one small spill. Keep the door tidy for easy grabs. This tiny habit keeps your refrigerator calm every day.
Weekly restock and shelf check
Before shopping, scan dates and freeze what you won’t use. Restock categories so snacks, dairy, and produce are easy to find.
Adjust one set of shelves if your groceries changed this week. Empty drawer crumbs and wipe one zone. Keep it light and doable.
Monthly deep tidy and layout review
Take out categories. Wipe shelves and bins. Put things back in order. Check airflow. Do not overpack storage so cooling stays even.
If a bin is always messy, try a different size or organizer. Revisit shelf spacing to match current groceries. Swap zones seasonally for school or holidays.
Always: Small steps keep the system working. You don’t need perfection. Gentle, steady habits make your home calmer.

| Routine | Time | Core actions |
|---|---|---|
| Daily reset | 2 minutes | Move Eat First items, cap things, return to bins |
| Weekly check | 15 minutes | Scan dates, restock categories, adjust one shelf |
| Monthly tidy | 30–45 minutes | Deep clean, review layout, check airflow |
“Tiny habits save time and keep the refrigerator calm.”
Room-by-Room Connections: kitchen, pantry, and more
A little prep outside the kitchen frees up space inside it. Let nearby rooms support your daily fridge routine. Small moves in each spot keep your home calm and your food easier to find.
Kitchen and pantry flow: where bins and backstock live
Keep backstock in the pantry, not the refrigerator. Use one bin per category so refills are quick. Label bins for snacks, baking, and breakfast. That stops overfilling and saves shelf space.
Use clear containers for overflow. A beverage dispenser on the counter can hold drinks and free door space. Store infrequently used jars on a turntable in the pantry so they don’t block daily items.
Entryway and lunch zone: grab-and-go harmony
Create a small lunch station near the entry. Keep napkins, utensils, drink boxes, and sandwich bags together. Kids can pack their own lunches faster.
Place a checklist or reminder card by the door. A short note at night helps smooth mornings.
| Room | Best use | Simple tool |
|---|---|---|
| Kitchen | Daily prep; quick refills | Small bins; one shelf for leftovers |
| Pantry | Backstock and bulk | Labeled bins; turntable for odd jars |
| Entryway | Lunch packing | Caddy with utensils and drinks |
| Closet / Utility | Extra containers and lids | Tote or clear box by size |
| Garage | Bulk drinks and canned goods | Stackable storage bins |
Other spots help too. Keep a mini cleaning kit in the bathroom for quick wipes. Store extra container sizes in a closet. Use a small kids’ organizer with a checklist for lunch-ready items.
“Put things near where you use them. Small shifts outside the refrigerator keep the system gentle and lasting.”
Troubleshooting: when your system stops working
A tiny tweak often restores calm faster than a big redo. You do not need to force a method that feels wrong. Try a different option. Small swaps keep things gentle.
Quick fixes for common problem areas.
If a bin overflows, split that category into two smaller areas. If drawers become catch-alls, add simple dividers and label each section. If plastic storage containers feel messy, switch to stackable sets or upcycled jars that nest neatly.
- If items hide in the back fridge zone, add a turntable or a pull-out tray to bring things forward.
- If shelves don’t fit groceries, adjust heights. One small change can fix daily frustration.
- If temps feel uneven, reduce crowding. Leave space near vents and along the back.
- If meats migrate upward, anchor a bottom bin labeled “Raw Proteins Only” to guide everyone.
If you keep forgetting to store leftovers, place a container and tape by the stove as a visual cue. If a way stops serving you, choose a new method without stress. Systems should flex with real life. Be kind to yourself.
“Small, specific changes bring the calm back.”
| Issue | Calm fix | Why it helps |
|---|---|---|
| Overflowing bin | Split into two areas | Items stay visible; less searching |
| Lost items in back | Turntable or pull-out tray | Brings items forward; fewer forgotten jars |
| Cluttered shelves/drawers | Adjust shelves; add dividers | Keeps categories tidy and easy to store |
Conclusion
You don’t need a perfect system to make daily life easier. A kind, simple approach works better. Small steps add up.
Start with one shelf and one clear container. Keep ready-to-eat items near the top. Put raw meats low and toward the back for safety.
Use a single turntable or a couple of bins to keep things visible. Match containers to your shelves so air can move and storage stays efficient.
Label and date gently. That cuts waste and protects your money and time. Pour bulky drink bottles into space-saving options if it helps.
Revisit monthly. Shift shelves as your groceries change. A two-minute reset tonight is a soft, useful next action. You have what you need to store food well and keep the fridge calm.
FAQ
How often should I do a quick reset of the refrigerator?
Do a two-minute tidy every day. Wipe spills, toss obvious garbage, and move items that belong elsewhere. This small habit keeps shelves calm and prevents bigger cleanups.
Where should raw meat go to avoid leaks and cross-contamination?
Store raw meat, poultry, and seafood on the lowest shelf or in a dedicated drawer. Use a leak-proof container or tray. That keeps juices from dripping onto ready-to-eat foods.
What’s the easiest way to track leftovers and prepared meals?
Use clear containers and a simple labeling method. Write the date and contents with masking tape or a label maker. Place soon-to-eat items in a front “Eat First” bin.
How can I make condiments and small items easy to find?
Put them on a Lazy Susan or in a small clear bin. Group similar items together. Everything stays visible and you save time searching.
What should I store on the top and upper shelves?
Keep ready-to-eat foods there. Leftovers, prepared salads, and drinks are ideal. These spots are the warmest inside. So use them for items you eat without cooking.
Where do dairy and eggs belong for best freshness?
Place dairy, yogurt, and eggs on middle shelves. These areas maintain consistent temperature. Keep cheeses wrapped and in small containers to control odor and moisture.
How do I set shelf heights to fit real shopping habits?
Measure the tallest items you buy. Adjust shelves so milk, juice, and tall bottles fit without wasted space. Create zones for what you actually bring home.
What containers work best for visibility and longevity?
Choose clear bins and glass storage. Silicone bags are great for flexible space. Clear items help you see what you have. Glass holds up to repeated use and keeps food fresher.
How long can common meats stay in the refrigerator?
Fresh poultry and ground meat last 1–2 days. Whole cuts like steaks or roasts last 3–5 days. Cooked meats usually keep for 3–4 days. When in doubt, label with dates and trust smell and texture checks.
How do I set up a kid-friendly snack zone?
Create a low shelf or drawer with portioned snacks in clear containers. Use easy labels and a simple rule: take one pre-portioned item at a time. This builds independence and reduces constant requests.
What’s a simple weekly routine to keep things running?
Do a short weekly check. Toss expired items. Wipe shelf fronts. Restock staples and rotate older items to the front. This keeps the system working without extra stress.
How can I reduce food waste with a rotation system?
Adopt “oldest in front, newest in back.” Keep an Eat First bin for items that must be used soon. Label dates so nothing hides and turns into waste.
What should I do during a monthly deep tidy?
Empty shelves. Wash them. Check temperatures and seals. Reassess layout and adjust bins or shelf heights if shopping habits changed. A gentle reset restores calm.
How do I keep dairy and strong-smelling items from affecting other foods?
Use sealed containers for strong cheeses and open sauces. Group aromatic items together in a bin. This protects produce and prepared meals from flavor transfer.
What tools are worth investing in for long-term ease?
Clear stackable bins. Glass food storage. A label maker. A small tray for raw meat. These simple tools make a big difference. They save time and reduce stress.
How do I adapt the system when it stops working?
Notice what’s failing. Are snacks messy? Leftovers hidden? Tweak one small thing. Move a bin. Change a shelf. Small adjustments keep the plan realistic for your life.