Freezer Organization: Easy Zones to Set Up
You are busy. You want calm in the kitchen. A tidy, simple system can give you that quiet start each day. Small habits save time and reduce waste.
Label items right away. Date first. Then name the contents and add quick cook notes if you remove packaging. Freeze bags flat. Then stand them up like files for easy visibility.
Set clear zones. Keep light things in the door and heavy ones low. Use bins to limit quantity. Full means pause. Space means restock.
Follow FIFO. Put older food in front. Newer items go to the back. Keep a small inventory on the door or in your phone. Plan one weekly meal to eat from what you already have.
Key Takeaways
- Label and date items immediately to avoid waste.
- Freeze flat, then stand bags up for visibility.
- Use simple zones and bins to guide quick returns.
- Follow FIFO to save time and reduce spoilage.
- Add tiny daily and weekly habits for lasting calm.
Quick Start: Clear, Sort, and Set Simple Limits
Start with a quick clear-out to see what you actually have. Work in short bursts. One drawer or shelf at a time. You will feel calmer fast.

Declutter fast
Do a five-minute sweep. Pull out mystery items. If you can’t ID them, let them go.
Combine duplicates into one bag or container. Toss soggy boxes. Save cut-out directions with the food.
Measure before you buy
Measure width, depth, and height inside your drawer or shelf. Write numbers down.
This prevents returns. It helps you choose bins and containers that fit the space.
Basic toolkit
Start small. Two handled bins. Freezer tape and a permanent marker. A sheet of labels. A few sturdy bags for flat-packing.
Flat-pack soups and sauces. Freeze flat, then stand them up to maximize space. Set simple limits: one bin per category. When a bin is full, pause buying.
- Five-minute sweep.
- Combine duplicates.
- Measure first.
- Start with a small toolkit.
- Create a “use soon” spot near the front.
Freezer Organization: Easy Zones to Set Up
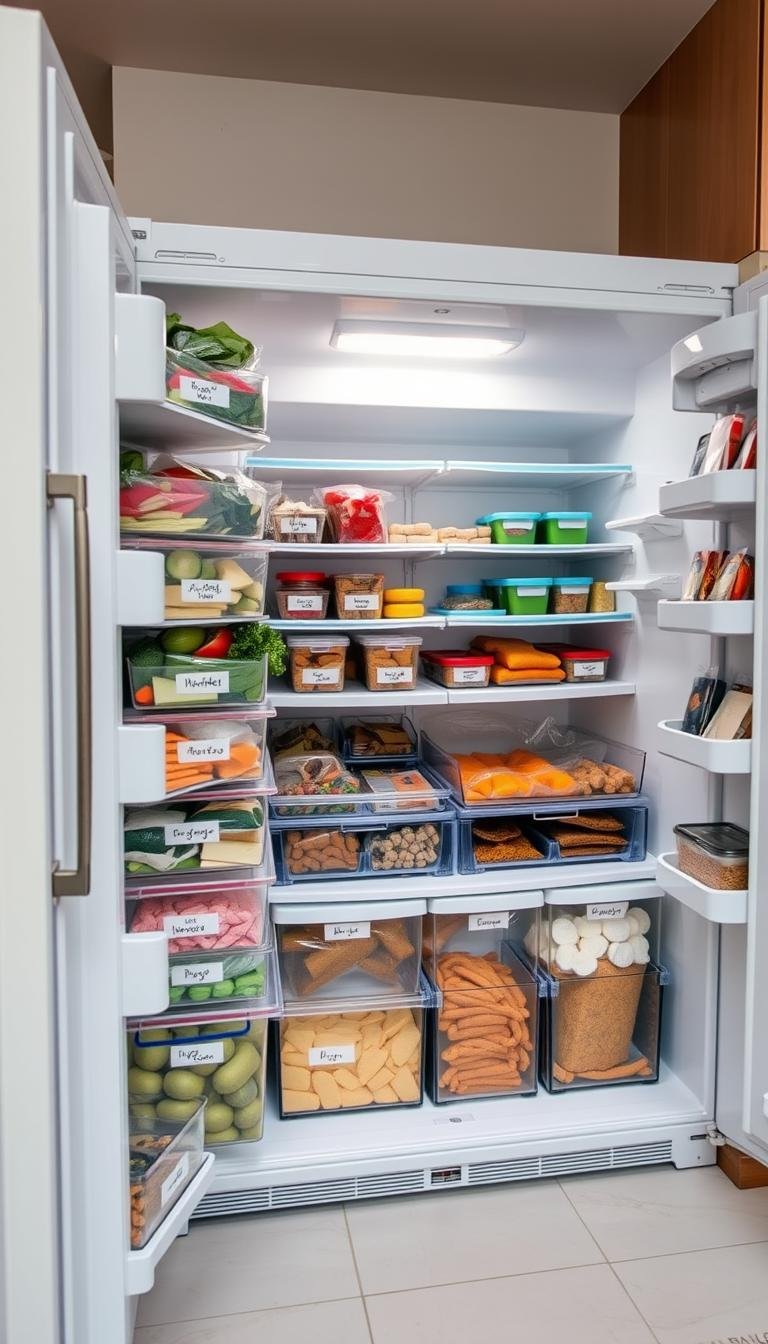
Set a few simple zones and everything finds a home. Keep labels clear. Use broad categories so the whole family can help.

Meat and seafood zone
Place on the bottom shelf or in a leak-safe bin. This prevents drips. Keep chicken, fish, and other meat together. Or split by type if that feels easier.
Vegetables and fruit zone
Store upright and visible. Use a bin for frozen vegetables and fruit blends. Grab fast. Remove extra boxes to open space.
Prepared meals and leftovers
Freeze flat. Then file like books so you can see each option. Label bags with date and contents. A small “use this week” spot helps meal planning.
Breakfast and kid-friendly snacks
Keep pancakes, waffles, and nuggets at the top or front. Kids can grab their own snacks. It saves time in busy mornings.
Door shelves
Only light items here. Butter, herbs, nuts, small bags of fruit, and ice packs belong on the door. Avoid heavy foods on the door for safety.
| Zone | Location | Key items | Tip |
|---|---|---|---|
| Meat & Seafood | Bottom / leak-safe bin | Chicken, fish, frozen meats | Prevent drips; label date |
| Vegetables & Fruit | Shelf or upright bin | Frozen vegetables, fruit blends | Store upright for visibility |
| Meals & Leftovers | Middle shelf or drawer | Flat-packed meals, casseroles | File like books; date bags |
| Breakfast & Snacks | Top / front | Pancakes, waffles, nuggets | Keep kid-friendly access |
Simple Systems That Save Time and Space
A few steady steps will turn clutter into a calm, usable system. These moves are small. They are easy to repeat. Over time they protect food and your peace.

Label immediately
Write the date first. Then add the contents. Add a short cook note if you removed a box or recipe card. A clear label saves decisions later.
Stand items up
Freeze flat for a few hours. Then stand bags upright like files. Vertical storage turns piles into a quick list you can scan.
Practice FIFO
Put older items at the front. Slide new ones to the back. This small reset protects every meal and cuts waste.
Decant and track
Remove bulky boxes and excess packaging. Keep cut-out directions taped to the bag or lid. Keep a tiny inventory on the door or in your phone. Update it when you add or remove items.
- Use containers to set limits. One bin for meat. One bin for veggies.
- Set a “use soon” spot. Plan one meal night from it.
- End grocery trips with a one-minute tidy: label, file upright, rotate.
Setups by Freezer Type: Right-Sized Systems
Match your storage to the shape of your unit, not the other way around. A small plan for each type makes daily use calm. Measure first. Then choose handled bins that fit.
Top freezer: Use two to four labeled bins. Side-stack breads and boxed products to keep a tidy front. Leave some breathing room so cold air moves freely. Put flexible items on the door.
Pull-out drawer: File the top drawer with flat-packed meals and leftovers. Use the factory divider to split the bottom into a left side and a right side. Flat-pack meat to maximize space. Keep one lift-out bin for chicken and fish.

Side-by-side: Use broad categories on shelves. Place chicken and meat low in leak-safe bins. Label doors and bins for quick returns. Stack a box of pizzas at a shelf base to create vertical room.
Stand-up: Choose medium clear bins by category. The front view makes scanning easy. Simple labels help everyone find items fast.
Chest / deep freezer: Build a 3×3 grid of labeled bins if space allows. Measure interior to pick bin sizes. Tape a laminated diagram to the lid so family members know where items live. Keep a small inventory card clipped nearby.
| Type | Best bins | Key tips | Quick win |
|---|---|---|---|
| Top freezer | 2–4 small handled bins | Side-stack boxes; avoid overfilling | Keep door for flexible items |
| Pull-out drawer | Shallow file bins + one lift-out | File top; split bottom left/right | Flat-pack meat to save space |
| Side-by-side | Medium bins for shelves | Label door shelves; keep meats low | Stack pizzas at shelf base |
| Stand-up | Medium clear bins by categories | Front view; simple labels | Scan at a glance |
| Chest / deep freezer | Nine medium bins (3×3 grid) | Measure first; laminate a map | Clip an inventory card to lid |
Gentle Daily, Weekly, and Monthly Routines
A tiny check each day protects your meals and your time. These routines are soft habits. They help your system stay useful without pressure.

Daily two-minute reset
Spend two minutes after cooking or unpacking. Slide items back to their zones. Note one or two low items on a list.
Weekly ten-minute plan
Set aside about ten minutes every week. Review your inventory. Pick one night to eat from what you already have. This saves time and avoids waste.
Monthly mini-audit
Once a month, group partial bags. Combine where safe. Rotate older items forward. Lift bins and wipe them quickly.
Seasonal or quarterly deep reset
If frost builds, defrost and refresh labels and diagrams. Rethink zones as meals change with the season. A short seasonal tune-up keeps the system calm.
- Share the load. Ask families to return items to labeled spots.
- Use a timer. Five minutes is enough to build momentum.
- If a drawer feels crowded, pause buying for a few days. Enjoy what you have at home.
- Celebrate small wins. Less waste. Faster dinners. More calm in your day.
Room-by-Room Examples to Support Your System
Place smart outposts in daily rooms so cold items move quickly and calmly. Small stations cut stress. Each room has a simple job. You will feel the difference.

Kitchen
Prep once. Freeze flat. Soups, sauces, broths, and leftover meals stack and stand upright in the drawer. This saves time at mealtime.
Pantry
Keep backup labels, freezer tape, and a marker in one spot. Add a short meal list that uses what is in your kitchen freezer.
Entryway
Store a cooler bag by the door. Move groceries fast from car to cold. It protects fresh foods on hot days.
Bathroom
Use a slim bin on a shelf for ice packs. They are ready for headaches or bumps. No digging behind boxes or bags.
Bedroom & Closet
Add a tiny “freezer check” to your evening routine. One quick glance. Note what to use tomorrow.
Keep a few extra labeled bins in the closet for seasonal swaps. Clear containers free up space and reduce clutter.
| Room | Quick setup | Top tip |
|---|---|---|
| Kitchen | Flat-pack meals in top drawer | File upright for fast grabs |
| Pantry | Labels, tape, meal list | Replace markers with the same pen |
| Entryway | Cooler bag by door | Move perishables to cold within minutes |
| Bathroom / Closet | Slim bin for ice packs; extra bins | Keep bins labeled by categories |
- In a drawer unit, file the top drawer for quick foods. Use containers on the right side and a simple bin on the left side for flexible items.
- Keep door shelves for light things like herbs and ice packs.
- Decant into clear containers when helpful. It keeps bags and boxes tidy.
Conclusion
Try one tiny change today and see what shifts tomorrow.
Keep it simple, and focus on a few steady systems. Labeling, vertical storage, FIFO, and clear zones will lower stress. Measure before you buy containers so you maximize space and pick products that fit.
Start with one zone. Label one box or bag. File one bundle upright. Small moves change big things for your family and your home.
Plan one weekly meal from your freezer storage. Let containers and bins set limits. When you feel stuck, do a two-minute reset. Come back next time you shop or cook. You are doing enough.
FAQ
How do I start when my freezer is a mess?
Begin with a quick clear-out. Pull everything out into bins or a clean counter. Toss obvious freezer-burned or old items. Group like with like. Measure shelves and door pockets before buying any storage. This gentle first step saves time and keeps you from buying containers that won’t fit.
What should I keep in labeled bins versus loose on shelves?
Use handled or clear bins for small loose items, snacks, and anything that slips between shelves. Keep bulk meats and messy things in leak-safe bins on the bottom. Store flat-packed meals and vegetables upright in shallow boxes so you can see them at a glance. Labels make every bin a small promise you can keep.
How do I save space and still find food quickly?
Freeze flat in resealable bags, then stand them up like files. Remove excess packaging. Use a few stackable boxes for categories. Keep high-use items at eye level. A simple visual system reduces digging and saves minutes every meal.
How should I organize different freezer types (top, chest, side-by-side)?
Match the system to the layout. Top-freezers work well with a few labeled bins and side-stacked breads. Side-by-side needs clear shelf categories and door labels. Pull-out drawers are perfect for a file system in the top drawer and bins below. For chest freezers use a grid of clear bins and a laminated map on top.
What are quick daily and weekly habits that make a big difference?
Do a two-minute daily reset: return stray items to their zone and note anything low. Each week glance at your inventory and pick one freezer-meal night. These small habits keep clutter from growing and make meal planning calmer.
How do I label items for clarity and safety?
Label with the date first. Add contents and a short cook note if needed. Use freezer tape or a waterproof marker. Keep blank labels and a pen near the freezer so you can mark things as you pack them away.
How long can common items safely stay frozen?
Use general guidelines: cooked meals 2–3 months, raw poultry up to 9 months, beef 6–12 months for best quality, vegetables 8–12 months. Freeze quality declines over time. Label dates and use FIFO—first in, first out—to keep rotation simple.
How can I prevent freezer burn and wasted food?
Remove excess air by using flat-pack bags and squeezing or using a handheld sealer. Double-wrap awkward shapes. Keep packaging tight and avoid fluctuating temperatures by minimizing how long the door sits open. Clear labeling and regular rotation also reduce waste.
What items are best stored in the door versus the main cavity?
Keep light, durable items in the door—butter, small herb packets, ice packs. Avoid delicate or temperature-sensitive foods there. Use the main cavity for meats, prepared meals, and bulk vegetables where temps stay steadier.
How do I organize for a busy family with kids and snack needs?
Create a top-front snack zone with kid-friendly items. Use clear bins so kids can grab their own. Keep breakfast foods and simple lunches easy to reach. A visible system supports independence and reduces morning stress.
Should I keep an inventory and how do I maintain it?
Yes. Keep a simple list on the door or in your phone. Note key items and quantities. Update when you add or remove things. A quick weekly check keeps meals predictable and stops duplicate buys.
Any tips for seasonal deep cleaning or a chest/deep freezer reset?
Schedule a quarterly or seasonal audit. Defrost if needed. Combine partials, repackage into meal-size portions, and refresh labels. For chest freezers, empty into coolers, lay out a bin map, and return items to labeled zones to restore order.